You can directly create, edit, or delete a group from your app.
Create a group
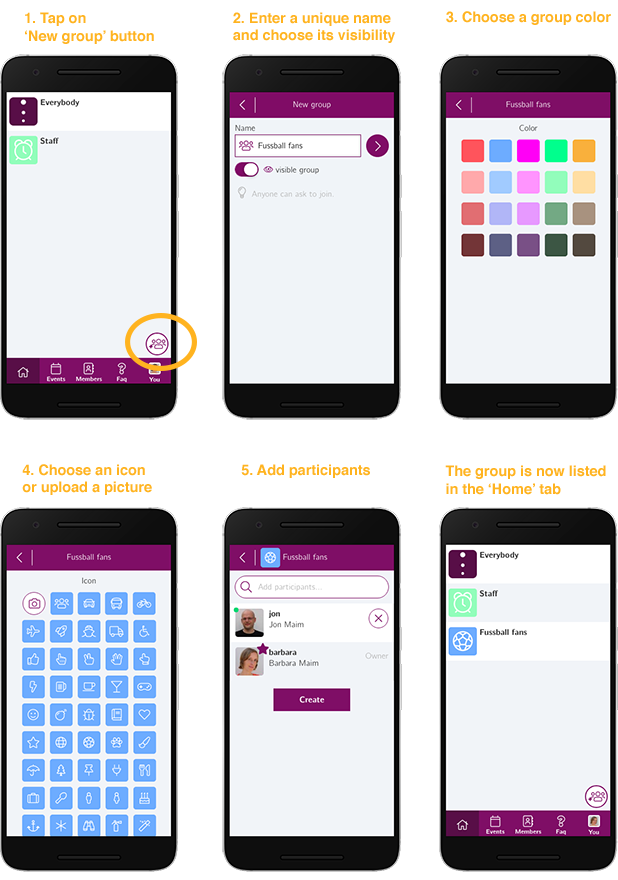
To create a new group, go to the “Home” tab of your app and tap on the “new group” button at the bottom-right. If you cannot see the “new group” button, it’s likely because the app only authorizes admins to create groups and you’re not currently logged in as an admin. Learn more about the different possible group configurations here.
Creating a new group is divided into 5 simple steps:
- Tap on the “New group” button.
- Choose a unique group name and its visibility (more about group visibility here).
- Choose its color.
- Choose its icon or image.
- Add the participants you want in the group and tap on the “Create” button.
As soon as the group is created, it is automatically added to your current list of groups and made visible to members who are allowed to view it.

Edit or delete a group
Only an admin or the group owner can edit or delete a group. The process is as follows:
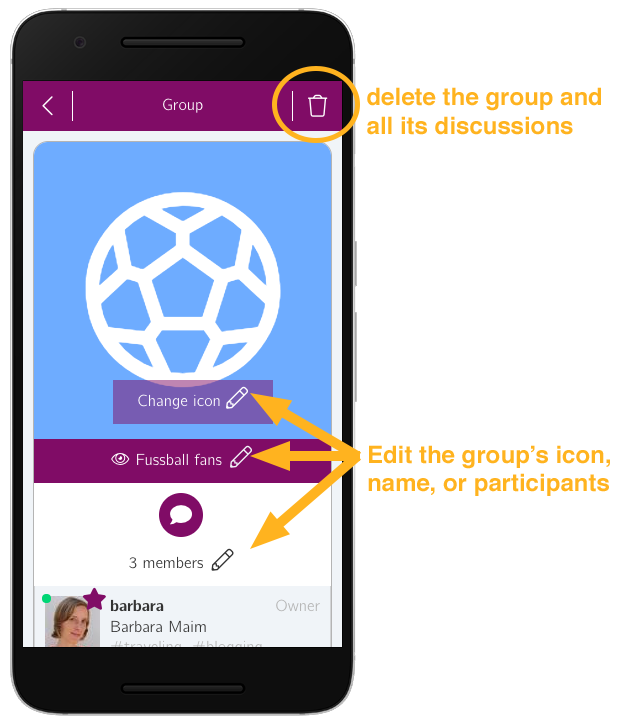
- Access the group’s page. To do that you can either: tap on the group’s icon in the “Home” tab, tap on the group’s icon from the group discussion’s header, or tap on the group’s name from your profile page.
- To delete the group tap on the delete button at the top-right of the group’s profile page.
- To modify the group, there are 3 edit buttons: the first one allows you to modify the group icon and color, the second one lets you update your group name and visibility, and the third one allows you to add participants to or remove them from the group. Tap on the appropriate edit button depending on what you want to do.

Conclusion
The group feature is very powerful and can be configured in many different ways in your app. Find out more about group configurations here.
Feel free to contact us if you have any questions.