Yes it does! In this article, we’ll take a closer look at a practical example of integration with Zapier. More specifically, we will check how to automatically create a new lead in the Freshsales CRM whenever a new user signs up in your app.
How to import new members into my app
Make user onboarding simpler by automatically generating user accounts
If you have a list of members you’d like to have on your app, it’s possible to pre-create user accounts for them. Each of them then individually receives an email with the links to download your app, along with their login details.
What do the app weekly usage reports contain
As soon as your app has over 15 users, we start sending you weekly activity reports to help you track the activity in your app and see how active your users are.

Unique active users
This number tells you how many unique users have been active on your app over the past week (Mon-Sun) and the previous week. By “unique users”, we mean that we count a user only once in a week, even though that user may be returning several times to your app. A user is considered “active” as soon as he or she opens the app, even if they do not like or post anything on it.
Example
If last week, Lisa has been on your app every single day posting messages, while George was on your app only on Tuesday to read the calendar and Fred visited your app on Wednesday and liked some content on Saturday, your total count of active users over the whole week is of 3 - 1 for Lisa, 1 for George, 1 for Fred.
Verified users
This number tells you how many new users signed up on your app over the last week (Mon-Sun) and the previous week. We do not take into account:
- new users that haven’t verified their email ID,
- new users that are pending for an admin’s approval, or
- new users that have been denied access by an admin.
The total number (mentioned between brackets) represents the current total number of verified users in your app since the very beginning.
Messages
This number tells you how many messages have been published on your app over the last week (Mon-Sun) and the previous week. This number includes:
- public messages, visible by all your users,
- messages posted in a group, and
- comments to either of the above.
This number does not include private messages.
The total number (mentioned between brackets) represents the current total number of such messages posted since the very beginning.
Note: messages that you directly or indirectly delete (e.g. by deleting a user) may alter the numbers from one report to the next one.
Private messages
This number tells you how many private messages have been exchanged in your app over the last week (Mon-Sun) and the previous week. This number includes:
- private messages sent to 1 or several recipients (using @mentions), and
- replies to private messages.
The total number (mentioned between brackets) represents the current total number of such messages posted since the very beginning.
Likes
This number tells you how many users liked a post (see the Messages section above) over the last week (Mon-Sun) and the previous week.
The total number (mentioned between brackets) represents the current total number of likes your app content gathered since the very beginning.
Most liked messages
In this section, we display a maximum of 3 messages, all posted over the last week (Mon-Sun), which have gathered the highest number of likes. If no messages were posted, or no likes gathered, the section is not displayed.
More
Do you have other ideas? Looking for something you can’t find in the report? Let us know! We’re constantly improving these reports so that you can extract the most relevant information to you.
Need more people from your organization to receive the weekly reports? Contact us to get and update the list of recipients.
Where does your logo appear and where is Minsh mentioned
Minsh ONLY provides completely white-labelled apps.
In other words:
- there is no Minsh logo anywhere in your app,
- the web version of your app is published on your own domain name,
- your own domain name is used for all transactional emails sent from the app: “yourapp@yourdomain.com“
- the app is published on the app stores with your own developer accounts (we can help you obtain them),
- new users signing up have to agree to your own Terms of Use and Privacy Policy.
Feel free to send us an email if you have any queries!
What are the features of the admin dashboard
The Admin dashboard allows you to manage your members, messages and events.
What can I do with the optional custom page
Additional pages can be integrated into your app with the feature(s) of your choice, based on your needs.
File System
If you have many documents that need to be easily accessible, but at the same time well organized, the file system can store all your data in a hierarchy of folders. The app can be configured to allow all users to upload documents and create folders, or to restrict these rights to admins. The search input at the top of the page allows to easily find a document or folder, even if embedded deep into your folder hierarchy.
Documents
If your members need to have an easy access to important documents, it’s possible to store them all in the additional page. The app can be configured to allow all users to upload documents, or to restrict uploading rights to admins. Documents can be published for everyone to see, or in a specific group. If you have many documents, it’s also possible to enable a search input at the top of the page.

Listings
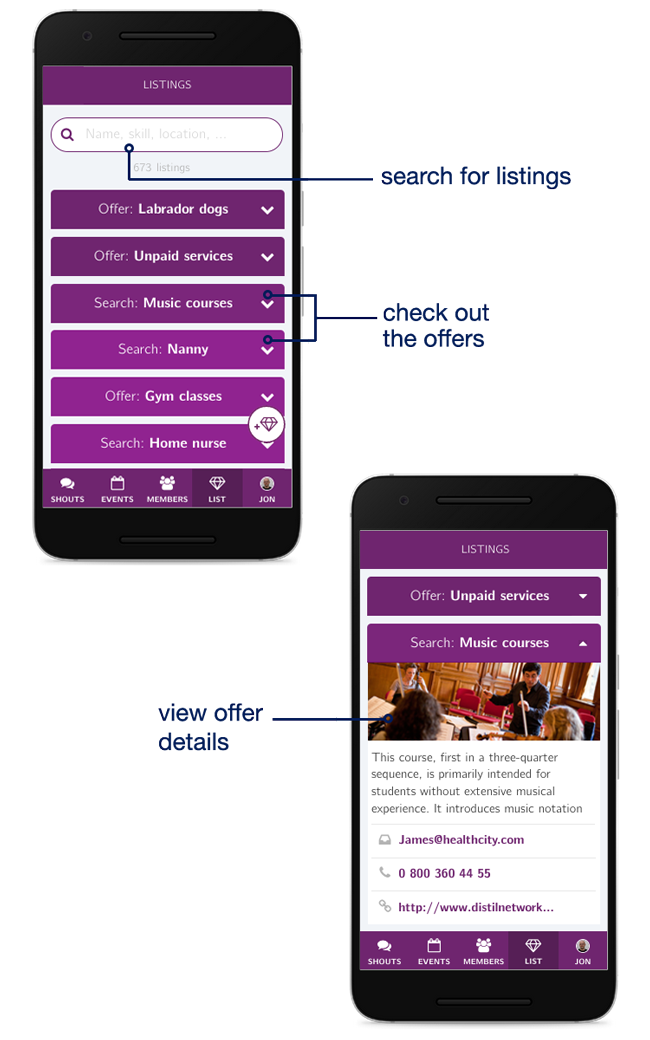
The listings page allows admins and/or users to post announcements or ads for a specific group, or for everyone.
Sponsors or promotions
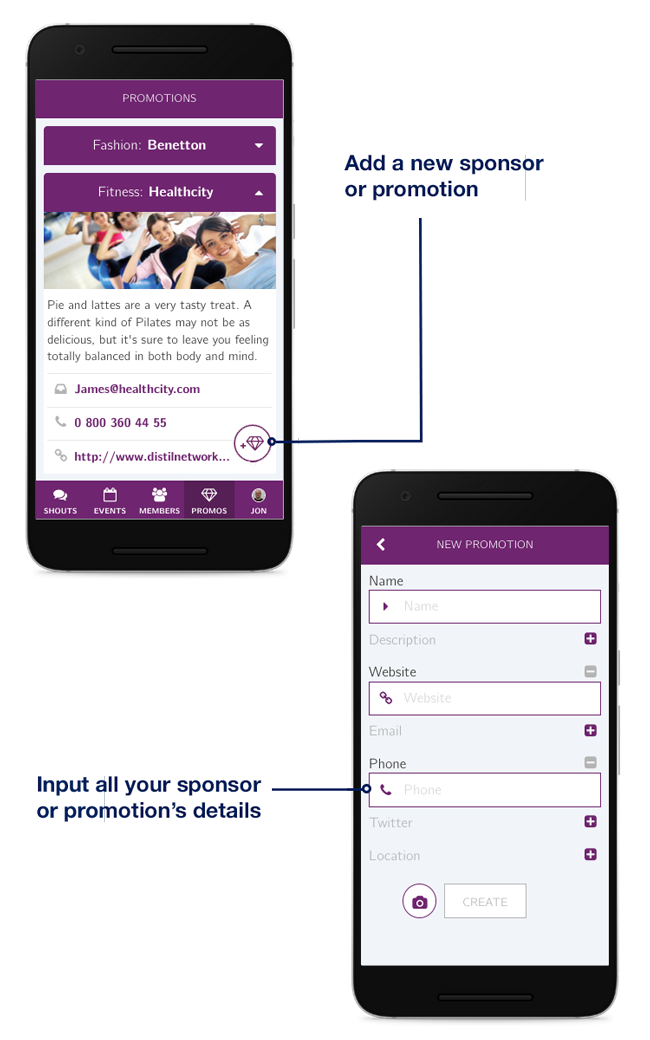
With this page, the admins can easily feature their sponsors, along with their contact details. They can also use the page to share with the community special promotions from partners. Again, the creator of each element can choose to add it to a specific group, or to make it visible to the entire community.
Resources
The resources or links page allows admins to share a series of static links with the entire community.
This functionality is not dynamic: if you’re interested in using it, we’ll ask you for the pictures and associated links you want to share, and we’ll take care of setting up this page for you.

Web view
Another possibility is for you to integrate a URL of your choice. [Contact us](mailto: hello@minsh.com) if you’d like to integrate your own page, and a member of the Minsh team will help you set this up.

Are you interested, or have you any questions? Feel free to [contact us](mailto: hello@minsh.com) anytime!
How can I sync the app with Instagram or Facebook
As an admin of your app, content generation can be painful, as you’re already working on original content for Facebook or Instagram for instance. To make your life simpler, we provide integrations with major social media channels.
In this article, we show you how to sync your Facebook page with your app so that new posts on Facebook magically appear in your app. The process is relatively similar with other social media channels, so feel free to try out with them and let us know if you need any help.
Overview
Zapier is a tool which allows you to create “Zaps”. A Zap is an automated process which links two different applications together. One application is used as a “trigger”, and the other one as an “action”. For instance our Zap needs to post a new message in the app whenever some content is published on the Facebook Page:
- The Facebook Page is the trigger: whenever a new post is published there.
- The action happends in the app: publish the FB Page content in it.
In the following steps, we explain step by step how to set up this Zap with a real example: we’re connecting the “Minsh” Facebook Page with the “Minsh Premium” Demo app.
Any Fees involved?
As long as there are less than 100 new posts per month on your Facebook Page, Zapier will not charge you a dime. However, if you go beyond 100 posts per month, any additional post will be queued until the end of the month unless you upgrade your Zapier plan.
Requirements
For this integration to work, there are a few prerequisites:
- You need to be an admin of the FB Page
- You need to be an admin of the app
- You need to know your Minsh API endpoint (just ask us if you don’t know)
- You need an account on Zapier (it’s free!)
Are you ready? Let’s get started!
1. Get invited
To use Minsh in Zapier, you need an invitation. Please click here to get one. Then, click on the “Accept invite and Build a Zap” button.

2. Make a Zap!
Congratulations! You now have access to Minsh through Zapier! Click on the “Make a Zap!” button at the top-right of the page to set up your first Zap.

3. When this happens …
Time to set up the “trigger”. Type “Facebook” in the search input and click on the “Facebook Pages” application.

4. Choose Trigger Event
Zapier can handle several triggers in a Facebook Page. The one we are demonstrating in this tutorial is “New Post To Your Timeline”. If you see another trigger which seems more appropriate to your use case, feel free to use it. Click on the trigger, then click on “Continue”.

5. Choose FB Account
If you’re not yet logged in on Facebook, click on the “Sign in to Facebook Pages” button and enter your Facebook credentials

6. Continue
Make sure you’re connected with the correct user account on Facebook: this user needs to have admin rights on the Facebook Page. Click on “Continue” when prompted by Facebook.

7. Select Facebook Page
If you have several Facebook Pages, Facebook prompts you to select which Page(s) you want to connect to your app. Select the appropriate Page(s) and click on “Next”.

8. Give proper rights to Zapier
Last step on Facebook is to give the appropriate rights to Zapier. Indeed, for Zapier to read your Facebook Page content, it needs access to it. Make sure all switches are set to “YES” and click on “Done”. Click on “OK” and you’re done with the Facebook part.

9. Name your Zap
Back to Zapier, let’s give a name to your Zap. You can do so by clicking on “Name your zap” at the top-left of the page.

10. Connect Zapier to Facebook Page
We’re not done with the trigger yet. Steps 5 to 8 allowed you to give Zapier the proper access to your Facebook Page, but we still need to tell Zapier what to do with that. Click on the “Page” input. Now that Zapier has access, the name of your page should appear in the dropdown menu. Select it and click on “Continue”.

11. Test and Continue
Click on “Test and Continue” to allow Zapier to pull some sample posts from your Facebook Page. It will help you at a later stage to test your Zap.

12. Do this…
Trigger is ready! Time to set up the action. Search for “Minsh” and select the app. If you’re not able to find it, you probably missed Step 1. No worries. Just go back to Step 1, click on the invitation link and refresh the page.

13. Choose Action Event
Click on “Choose Action Event” and select “Create Shout”. Click on “Continue”.

14. Choose Account
Click on “Sign in to Minsh”.

15. Configure Minsh App
Zapier needs to know how to post a message on your app, and with which user account. First, enter your app’s API endpoint. If you don’t know it, just ask us and we’ll send it to you. Second, enter the username and password of the admin who will be posting on behalf of Facebook. Click on “Continue”.

16. Customize Shout
You can customize the posts coming from your Facebook Page so that they appear in a certain way in the app. For instance, you can add a “- synced with Facebook” note at the end of every post. Here, we offer you some recommendations, but feel free to adapt your post to your needs:
- Click on the right-side button of the “Text” input
- Select “Message”
- In the “Text” input, add a white space after the “Message”
- Click again on the right-side button of the “Text” input
- Select “Link”
- Click on “Continue”

17. Send Data
WARNING! This step will actually publish one of your most recent Facebook posts into your Minsh App!
The selected Facebook post is one of the samples Zapier pulled at Step 11. You can preview the content in the window. If you’re comfortable with this, click on “Test and Continue”. If you’d rather have a different Facebook Post published into your app, go back up into the Facebook Page configuration (see Step 11) and select another sample.
Once you’re comfortable, click on “Test And Continue”.

18. Check
If everything went well, a success message is displayed at the top of your window.

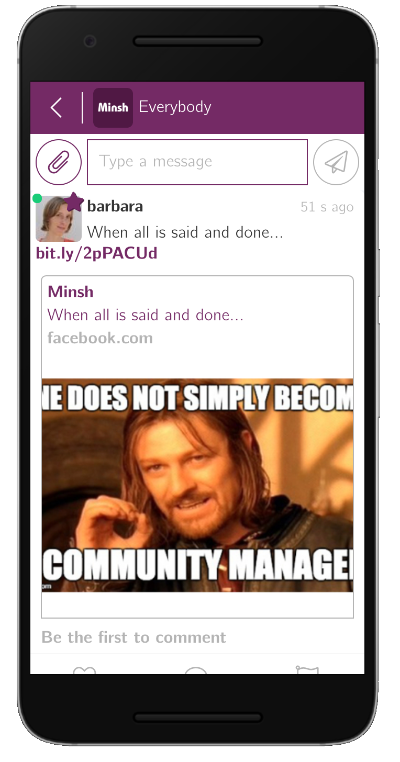
Open a new page on your browser and visit the web version of your app. Check that the post indeed is there. If you’re not happy with how it looks, go back into Zapier and edit the post as you wish (Step 16). Beware! You’ll have to test again your changes and that will trigger a new post into your app!
19. Done Editing
Go back to Zapier and scroll to the bottom of the page. Click on “Done Editing”.

20. Turn On
Click on “Turn Zap On” and you’re done! As soon as this Zap is switched on, it checks every 15 minutes if there are any new posts in your Facebook Page and automatically adds them to your app.

How to link your Facebook page with your Minsh app
Learn how to configure your Facebook page button so that users are redirected to your Minsh app.
If you’re looking for a solution to automatically publish your Facebook posts in your app, refer to our article on How to sync the app with social media channels.
How to delete a member?
If you are an admin, there are two ways for you to delete a member: from the app or from your admin dashboard. Warning! There is no going back, so think twice before you delete a member!
Use the app
Here are the steps to follow in order to delete a user directly with the app:
- Find the member you’re looking for (either use the search box in the member directory or find a message created by that person).
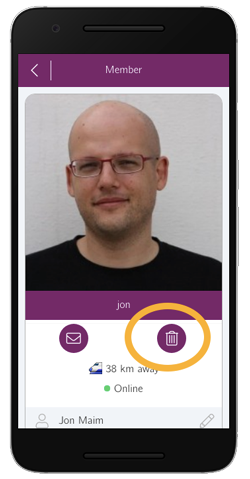
- Tap on the member’s name or picture; you will then reach that member’s profile page.
- If you’re an admin, under the profile picture, you can see a “terminate” button. Tap on that button and confirm.
- The member and all associated posted content are deleted forever.
Use the admin dashboard
Users can also be managed from your online admin dashboard:
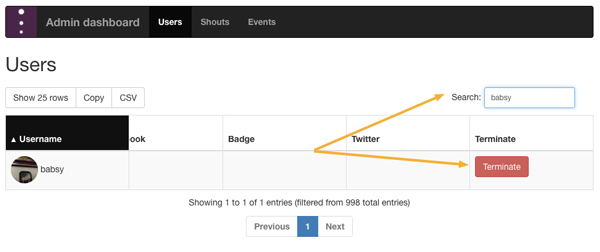
- Open your admin dashboard.
- Navigate to the “Users” tab if you’re not already there.
- Use the search box at the top right or scroll down to find the person you want to delete.
- Scroll all the way to the right and delete the user by clicking on the “Terminate” button.
